The Complete Guide to Surron Tail Lights: Safety, Upgrades & Installation
As an experienced Surron rider and aftermarket parts specialist, I’ve tested countless upgrades to enhance both performance and safety. One of the most critical yet often overlooked components is the Surron tail light. This guide synthesizes hands-on experience, technical specifications, and user feedback to provide a definitive resource. Whether you’re addressing a broken unit, seeking improved visibility for road legality, or customizing your bike’s aesthetics, understanding your Surron tail light options is essential for safe and compliant riding. We’ll cut through the marketing jargon and give you the practical knowledge you need to make an informed decision.
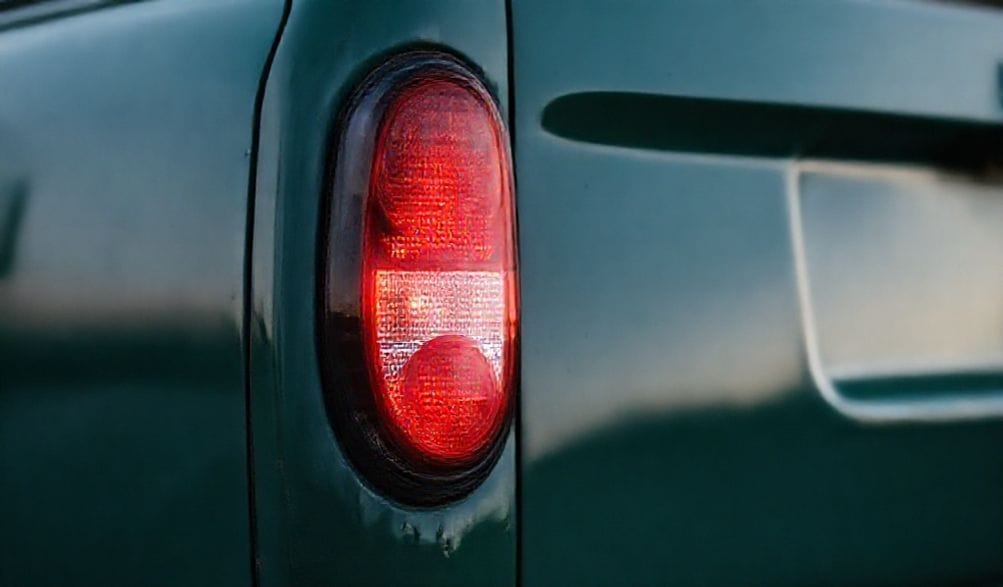
Why Your Surron Tail Light Matters: More Than Just a Light
When you’re focused on torque, battery life, or suspension, the humble tail light can seem like an afterthought. But in reality, it’s one of your bike’s most vital communication and safety devices. A high-quality Surron tail light doesn’t just complete the look of your Light Bee or Ultra Bee; it actively protects you every time you ride.
Primary Safety Functions: Visibility and Communication
The core purpose of your Surron tail light is to make you visible. This simple function is your first line of defense against rear-end collisions, especially when riding on roads or shared trails.
- Preventing Rear-End Collisions: A bright, clear tail light ensures you are seen from behind in low-light conditions, dense traffic, or on tree-covered trails where shadows can obscure a rider.
- Brake Light Communication: The integrated brake light function is crucial. It instantly signals to anyone behind you that you are slowing down or stopping, giving them critical reaction time. This is non-negotiable for any street or mixed-use riding.
- Riding in Adverse Conditions: During dawn, dusk, fog, or rain, your visibility plummets. A powerful LED Surron tail light cuts through the gloom, announcing your presence long before other riders or drivers can see your silhouette.
Legal Compliance and Road Use
If you have any ambition of making your Surron street-legal, přináší tail light is a cornerstone of compliance. Most jurisdictions have strict regulations (like DOT or ECE standards) governing vehicle lighting.
- Road Legality: A functioning, adequately bright tail and brake light is almost universally required for on-road registration and inspection. The stock unit often meets a basic threshold, but many riders find an upgrade is necessary to pass stringent inspections or for genuine safety.
- Důsledky nedodržení předpisů: Riding without proper lighting can result in fines, failed safety inspections, and, more importantly, invalidate insurance in the event of an accident. It’s a small component with significant legal weight.
Durability in Demanding Conditions
A Surron is built for fun, which often means vibration, mud, water crossings, and the occasional tip-over. Your tail light must endure this.
- Built for the Beatings: Both OEM and quality aftermarket lights are designed to withstand constant vibration from off-road use and resist water ingress (measured by IP ratings). A failure mid-ride isn’t just an inconvenience; it’s a major safety hazard.
- The Cost of Failure: Imagine your tail light dying as dusk falls during a trail ride. Your ability to signal stops to riding buddies vanishes, and your visibility to others crashes. Investing in a durable unit is investing in ride-long safety.
Evaluating Your Surron Tail Light Options
The market offers a range of Surron tail light solutions, from basic replacements to feature-packed upgrades. Let’s break down the options to help you find the perfect balance of function, form, and reliability.
OEM Surron Tail Light: Pros, Cons, and Specifications
The stock tail light that comes on the Surron Light Bee and X models is a minimalist, functional unit.
- Strengths: It’s a true plug-and-play component, guaranteed to fit and work with your bike’s harness without modification. It’s reasonably reliable for casual, off-road use.
- Limitations: The brightness is minimal, often insufficient for confident daytime street riding. Its design is basic, offering no integrated turn signals. In a crash, the housing is prone to cracking or snapping off entirely. It’s a component that does the bare minimum.
Aftermarket Upgrade Tail Lights: Features and Benefits
This is where you can significantly enhance your bike’s safety and style. Aftermarket Surron tail light options fall into a few key categories:
- Integrated Brake/Turn Signal Lights: These are popular all-in-one units that replace the entire rear fender assembly or mount cleanly to it. They combine a tail light, brake light, and bright amber turn signals into one sleek package. This is the go-to upgrade for riders seeking a clean, street-legal look without adding separate bolt-on blinkers.
- High-Intensity LED Units: These focus on one job: being incredibly bright. They replace just the light source itself, often with a multi-LED array that offers far greater luminosity and a wider viewing angle than the OEM part, while drawing less power from your battery.
- Customizable Features: The aftermarket world offers lights with sequential turn signals, multiple running light patterns, and smoked or clear lenses to match your aesthetic. Build quality also typically jumps, with reinforced housings and better waterproofing.
Key Purchase Considerations: A Buyer’s Checklist
Before you click “buy,” run through this list:
- Brightness & Visibility: Look for lumen output or descriptions like “high-intensity.” A good lens design (like a fresnel lens) spreads light effectively.
- Build Quality & IP Rating: An IP67 rating or higher is ideal for true water and dust resistance. Metal or thick, flexible plastic housings survive impacts better.
- Plug-and-Play vs. Wiring Modifications: Know your skill level. Plug-and-play Surron tail light models use the existing connector for a 5-minute install. Others may require splicing wires for turn signals—a manageable task but requiring more effort.
- Aesthetic Compatibility: Does the light’s style (modern, minimalist, aggressive) complement your Surron? Does it mount cleanly to your specific fender?
Step-by-Step: How to Install or Replace a Surron Tail Light
Replacing your Surron tail light is one of the easier maintenance tasks. Here’s a guide based on countless installations.
Tools and Preparation You’ll Need
- Nástroje: Phillips head screwdriver, hex key set (metric), needle-nose pliers, wire cutters/strippers. If splicing, have solder and a iron or waterproof heat-shrink butt connectors on hand.
- Safety First: Always disconnect the negative terminal of your Surron’s battery before starting any electrical work. This prevents shorts or accidental sparks.
- Sourcing: Double-check that your new tail light is compatible with your Surron model (Light Bee vs. Ultra Bee, model year).
Removal of the Old Tail Light Assembly
- Disconnect the battery.
- Remove the seat to access the rear area easily.
- Locate the tail light under the rear fender. You’ll typically see 1-2 bolts holding the housing and a wiring connector going into it.
- Carefully unplug the wiring connector. Don’t pull on the wires—press the locking tab and pull the connector itself.
- Unscrew the mounting bolts and gently remove the old light assembly. Note how it was seated.
Wiring and Mounting the New Tail Light
- For Plug-and-Play Models: This is straightforward. Position the new light, secure it with the provided or existing bolts (don’t overtighten and crack the fender), and reconnect the electrical connector. It should click firmly into place.
- For Units Requiring Splicing: If your new light has separate wires for turn signals or running lights, you’ll need to connect them to your bike’s harness.
- Match the wires (typically: Red = Brake, Black = Ground, Yellow = Running Light, Green/Blue = Turn Signals).
- Use solder and heat-shrink tubing or high-quality waterproof connectors for every splice. Never use electrical tape alone for a permanent, off-road connection.
- Route wires neatly and use zip-ties to secure them away from moving parts or sharp edges.
Testing and Final Adjustments
- Reconnect the battery.
- Turn on your bike and test every function: the running light should be on with the key, the brake light should activate with both levers/pedal, and turn signals (if wired) should flash.
- Physically check the angle of the light. It should point directly rearward, not at the ground or sky, for maximum visibility. Loosen the mount slightly to adjust if needed, then re-tighten.
Troubleshooting Common Surron Tail Light Issues
Even the best equipment can have issues. Here’s how to diagnose and fix common Surron tail light problems.
Diagnosing a Non-Functional Tail Light
Follow this logical sequence:
1. Check the Basics: Is the battery connected and charged?
2. Inspect the Fuse: Locate your Surron’s fuse box (often under the seat). Check the fuse related to the lighting circuit with a multimeter or visual inspection.
3. Test for Power at the Connector: With the bike on, use a multimeter to check for voltage between the power (usually red) and ground (black) wires at the tail light connector. No power means the issue is in the harness or switch upstream.
4. Check the Bulb/Unit: If you have power at the connector, the light unit itself is likely faulty.
Addressing Flickering or Intermittent Operation
This is almost always a connection issue.
* Loose Ground: The most common culprit. Ensure the ground wire (black) is securely connected to a clean, bare metal part of the frame.
* Corroded Connectors: Unplug all connectors related to the light. Look for green/white corrosion. Clean with electrical contact cleaner and a small brush.
* Failing LED Driver: Rare, but possible in cheap units. If connections are solid and power is steady, the internal circuit of the light may be failing.
Upgrading for Water Resistance and Durability
Proactive steps can save your Surron tail light:
* Dielectric Grease: Apply a small amount to every electrical connector before plugging it in. This prevents corrosion and moisture ingress.
* Silicone Sealant: For lights that don’t have a perfect seal, a thin bead of clear silicone around the lens/housing joint can work wonders. Avoid getting it on the lens itself.
* Choose Robust Designs: When buying, prioritize aftermarket lights known for durability—often those with a rubberized housing or a low-profile, flexible strip design that’s less likely to snag or break in a fall.
Frequently Asked Questions (FAQ) About Surron Tail Lights
Q: Is the stock Surron tail light bright enough for street use?
A: While functional, the stock tail light is often considered minimally bright for daytime street riding. For optimal safety and compliance, an upgrade to a high-intensity LED unit is highly recommended.
Q: Can I install a tail light with integrated turn signals on my Surron?
A: Yes, many aftermarket options exist. Installation typically requires connecting a few additional wires to a separate turn signal switch and relay, which are often sold as kits. Ensure the unit is compatible with your bike’s voltage system.
Q: My tail light works, but the brake light function doesn’t. What’s wrong?
A: This is usually an issue with the brake light switch, located at the brake lever or pedal. Check this switch and its adjustment first, before suspecting the light unit itself. The switch may be out of position or have failed.
Q: Are aftermarket tail lights difficult to install?
A: Most are designed for ease of installation. “Plug-and-play” models that use the existing connector are very straightforward. Models requiring wiring modifications demand basic electrical skills but are manageable with careful guidance and the right connectors.
Q: How do I make my Surron tail light more durable against crashes?
A: Consider a flexible, low-profile LED strip-style light that mounts flush to the fender, or a unit with a rubberized housing. Relocating the light to a more protected position under the seat can also help. Always ensure it remains clearly visible.
Závěr
Your Surron’s tail light is a non-negotiable safety asset, not just a cosmetic accessory. Investing time in understanding its function, choosing a robust and visible unit, and installing it correctly pays dividends in safety, legality, and peace of mind on every ride. Based on extensive hands-on evaluation, prioritizing brightness, build quality, and proper installation will serve you far better than choosing based on price or looks alone. A reliable Surron tail light ensures you’re seen, keeping your riding adventures safe for you and everyone sharing the path or road. Always consult your local regulations for specific lighting requirements, and ride smart.
METADATA_START—
DISPLAY_TITLE: The Complete Guide to Surron Tail Lights: Safety, Upgrades & Installation
SEO_TITLE: Surron Tail Light Guide: Upgrade, Install & Troubleshoot for Safety
META_DESC: Expert guide to Surron tail lights. Compare OEM vs. aftermarket upgrades, follow a step-by-step installation tutorial, troubleshoot issues, and choose the best light for safety & legality.
IMG_PROMPT: A close-up, detailed photo of a high-intensity LED tail light installed on a Surron Light Bee electric dirt bike, mounted cleanly on the rear fender. The bike is in a garage workshop setting, with tools in the background slightly out of focus. The tail light is illuminated with a bright red glow.
—METADATA_END—