The Ultimate Guide to the Surron Ultra Bee Tail Light: Safety, Upgrades & Installation
Riding a Surron Ultra Bee is about freedom and performance, but without a proper tail light, you’re invisible to traffic and potentially breaking the law. Whether you’re replacing a broken unit, upgrading for better visibility, or adding clignotants for légalité pour la route, the tail light is a critical component that deserves your attention. Many Ultra Bee owners seek information for reasons of safety, legality, and customization, yet find fragmented advice.
This guide cuts through the noise. Drawing from hands-on experience and technical knowledge, we’ve built a comprehensive resource focused on actionable, accurate information. Our goal is simple: to help you make informed decisions that enhance your visibility, ensure compliance, and let you ride with greater confidence. We’ll cover everything from the stock system and upgrade reasons to installation steps and legal considerations, all tailored specifically for the Surron Ultra Bee tail light.
Understanding Your Surron Ultra Bee’s Tail Light System
Before diving into upgrades, it’s essential to understand what you’re working with. The Ultra Bee’s lighting system is a step above its Light Bee predecessor, designed with more consideration for dual-sport use.
OEM Tail Light Specifications & Features
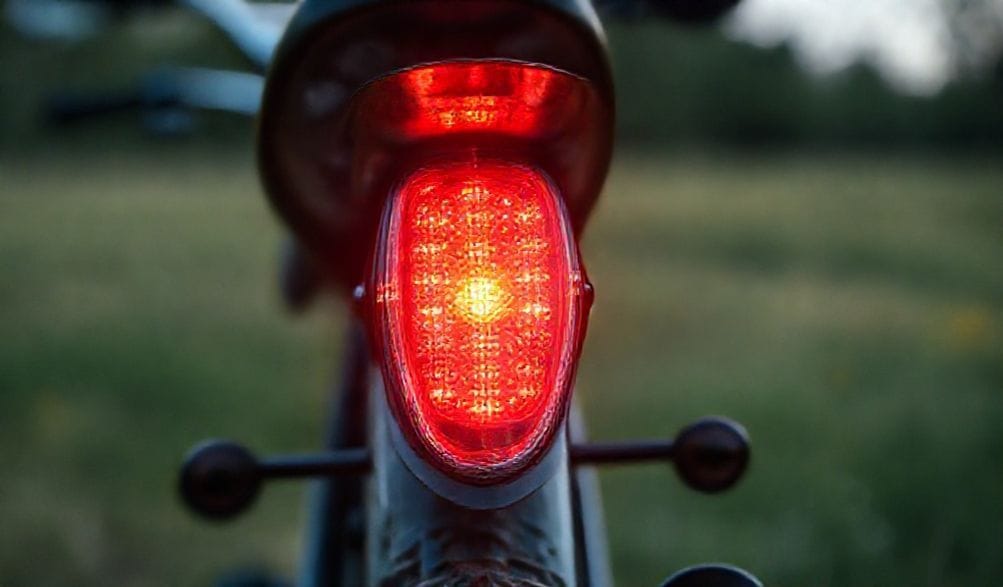
The stock Surron Ultra Bee tail light is an integrated unit housed within the rear fender assembly. It’s a sleek, low-profile design that maintains the bike’s aggressive aesthetic. Functionally, it’s a basic but effective LED unit with two primary functions:
- Running Light: A constant red illumination that activates when the bike’s headlight is on, making you visible from behind.
- Brake Light: A significantly brighter red light that triggers when you apply the rear brake. The Ultra Bee uses a hydraulic brake light switch integrated into the rear brake master cylinder.
The unit connects directly to the bike’s main wiring harness via a waterproof connector, typically located under the seat or within the rear fender cavity. Its operation is managed by the bike’s controller and lighting circuits. While perfectly functional, it represents a minimalist approach that leaves room for improvement, especially for riders who frequent public roads or demand maximum durability.
The Role of the Tail Light: Safety and Legal Compliance
This component is far more than a cosmetic accessory; it’s a vital piece of your riding safety kit.
- Safety: Your tail light is your primary signal to the world behind you. In low-light conditions, at dusk, or in heavy traffic, it defines your presence on the road or trail. A bright, functioning brake light provides crucial reaction time for vehicles following you, potentially preventing a rear-end collision. For off-road riders, it keeps you visible to your riding group in dusty or wooded environments.
- Legality: If you plan to ride on any public road, a functioning tail and brake light is non-negotiable. It is a standard legal requirement for vehicle operation in virtually all jurisdictions. The OEM Ultra Bee light provides the basic functions, but street legality is determined by your local vehicle code. Some regions may require specific brightness (measured in lumens or candela), certain dimensions, or additional features like side reflectors or a specific separation between the tail light and turn signals. Always check your local Department of Motor Vehicles (DMV) or transportation code. Riding without proper lighting can result in fines and, more importantly, invalidate insurance in the event of an accident.
Top Reasons to Upgrade or Replace Your Ultra Bee Tail Light
While the OEM light works, several compelling reasons drive riders to upgrade. These scenarios are common in the Ultra Bee community and highlight areas where aftermarket solutions excel.
Enhanced Visibility with Brighter LEDs and Patterns
The most immediate benefit of an upgrade is superior visibility. Aftermarket tail lights often utilize newer, higher-output LED chips or a greater number of LEDs.
* Brighter Output: More lumens mean your light is visible from a greater distance and in harsh daylight conditions.
* Faster Illumination: LEDs illuminate almost instantly, giving following drivers more reaction time compared to older bulb technologies.
* Customizable Patterns: Many upgrades offer programmable features like flashing brake lights (a significant attention-grabber), sequential turn signals, or multi-function displays that combine running, brake, and turn signals in dynamic patterns.
Increased Durability for Off-Road Use
The Ultra Bee is a capable off-road machine, and the stock plastic housing can be a vulnerability.
* Impact Resistance: Aftermarket units often feature housings made from reinforced polycarbonate or even CNC-machined aluminum, which can withstand roost from other bikes, debris kicks, and minor falls far better than stock.
* Better Sealing: Upgraded lights typically boast higher IP (Ingress Protection) ratings, such as IP67 or IP68, ensuring they remain functional after deep puddles, pressure washing, or muddy rides.
Adding Advanced Functionality
This is where upgrades truly transform your bike’s capabilities, especially for urban or dual-sport adventurers.
* Integrated Turn Signals: The OEM Ultra Bee lacks turn signals. A popular upgrade is a “3-in-1” or “4-in-1” tail light that integrates bright, amber LED turn signals into the same housing. This is a crucial step toward making your bike street-legal and much safer for indicating turns in traffic.
* License Plate Illumination: Many integrated kits include a small white LED to properly illuminate your license plate, which is another common legal requirement for on-road use.
* Improved Integration: Aftermarket options can offer a cleaner, more streamlined look than bolting on separate, bulky turn signal stalks.
How to Choose the Best Surron Ultra Bee Tail Light
With numerous options available, selecting the right tail light comes down to assessing your needs against key product features.
Key Features to Compare
When shopping, keep this checklist in mind:
* Brightness & LED Count: Look for specifications on lumens or simply judge by the density and quality of the LED chips shown. More/bigger LEDs generally mean a brighter output.
* Build Quality & Weatherproofing: Un IP67 rating is an excellent benchmark for a dirt bike/ebike, indicating total dust ingress protection and the ability to withstand temporary immersion in water.
* Compatibilité : This is critical. Look for products advertised specifically for the Surron Ultra Bee. Plug-and-Play (PnP) kits are the holy grail—they use connectors that match the OEM harness, making installation a tool-free connection. Custom wiring kits are cheaper but require splicing, soldering, and a much higher comfort level with electrical work.
* Design: Do you prefer a minimalist, low-profile look that mimics OEM, or a more pronounced, angular housing? Consider how it will affect the bike’s overall aesthetics.
Popular Aftermarket Categories for the Ultra Bee
While we avoid endorsing specific brands, products generally fall into these categories:
| Category | Pros | Cons | Best For |
| :— | :— | :— | :— |
| Direct OEM Replacements | Guaranteed fit/function, inexpensive, simple install. | No improvement in brightness/durability, no added features. | Riders with a broken stock light who want a quick, simple fix. |
| Premium 3-in-1 Upgrade Kits | Massive visibility boost, adds legal turn signals, often PnP, high durability. | Higher cost, may require separate handlebar switch purchase. | Riders using the Ultra Bee on-road, dual-sport enthusiasts, and anyone prioritizing max safety/legality. |
| Minimalist/Stylistic Options | Unique looks, often very bright, can be lighter weight. | Functionality may be limited (e.g., no turn signals), compatibility can be hit-or-miss. | Riders focused on custom aesthetics who ride primarily off-road. |
Budgeting for Your Upgrade
Investing in your tail light is investing in safety. Price ranges are generally:
* OEM Replacement: $20 – $50.
* Basic Aftermarket Upgrade (Brighter LED): $40 – $80.
* Full Feature 3-in-1 Kit (with turn signals): $80 – $180+.
Remember, value isn’t just about the lowest price. Consider the cost of a potential accident versus the one-time investment in a high-quality, highly visible lighting system.
Step-by-Step: Installing a New Tail Light on Your Surron Ultra Bee
For a plug-and-play kit, installation is straightforward. This guide assumes a PnP scenario. Always refer to your specific product’s instructions first.
Tools and Preparation You’ll Need
- Hex key set (metric)
- Phillips head screwdriver
- Electrical tape or heat shrink tubing
- Zip ties
- CRITICAL SAFETY STEP: Disconnect the main battery negative terminal before beginning any electrical work. This prevents shorts, protects the bike’s controller, and keeps you safe.
Removal of the OEM Tail Light
- Access the Unit: Remove the seat by unlocking it with the key and lifting it off. You may need to remove a side panel or two for better access to the wiring connector, depending on your model year.
- Disconnect the Electrical Connector: Locate the waterproof connector joining the tail light to the main harness. Press the locking tab and pull it apart.
- Remove the Assembly: Unscrew the two or three bolts (usually hex heads) that secure the tail light housing to the rear fender. Carefully remove the entire OEM unit.
Wiring and Mounting Your New Tail Light
- Connect the New Unit: This is the “plug-and-play” moment. Connect the new tail light’s plug to the bike’s harness. It should only fit one way. If your kit includes turn signals, you will also need to route and connect the wires for the handlebar switch at this time (following the kit’s instructions).
- Secure the Housing: Position the new tail light on the fender and secure it using the provided (or original) hardware. Do not overtighten, as you can crack the fender or light housing.
- Manage Wiring: Neatly route any excess wire along the bike’s frame. Use zip ties to secure the wiring away from moving parts, sharp edges, and heat sources. Keep the wiring loom loose, not taut, to prevent stress on the connectors.
Tests et réglages finaux
- Reconnect Battery: Re-attach the negative terminal to the battery.
- Test All Functions: Turn on the bike’s power. Check the running light. Apply the rear brake and confirm the brake light activates. If equipped, test the left and right turn signals using the new handlebar switch.
- Final Alignment: Stand behind the bike. Ensure the tail light is pointing straight back and is clearly visible, not angled down into the ground or off to one side. Make any final adjustments to the housing if possible.
Frequently Asked Questions (FAQ) About the Surron Ultra Bee Tail Light
Q1: Is the Surron Ultra Bee’s stock tail light street legal?
R : It provides the basic running and brake light functions required in principle. However, street legality is 100% determined by your local vehicle code. Some areas require specific certifications (DOT, ECE), certain brightness levels, or additional equipment like reflectors. The OEM light may not meet all these nuanced requirements. Always check with your local authorities for a definitive answer.
Q2: Can I install a tail light with turn signals on my Ultra Bee?
R : Yes, this is one of the most popular upgrades. Many aftermarket kits are designed specifically for this. Remember, you will also need a handlebar switch to operate them. Comprehensive kits include everything; others may require you to purchase the switch separately.
Q3: My tail light stopped working. What should I check first?
R : Follow this diagnostic order:
1. Fuse: Check the bike’s fuse box (usually under the seat or side panel) for a blown fuse related to the lighting circuit.
2. Connecteur : Inspectez le connecteur de câblage principal du feu arrière. Recherchez la corrosion, les broches pliées ou un mauvais contact.
3. Câblage : Examinez les fils menant au feu arrière, en particulier aux endroits où ils fléchissent près du garde-boue, pour détecter tout signe de pincement, de coupure ou d'usure.
4. Interrupteur : Testez l'interrupteur du feu stop sur le maître-cylindre (un multimètre est utile ici).
5. Bloc lumineux : Enfin, soupçonnez l'unité LED elle-même.
Q4 : Remplacer le feu arrière soi-même est-il difficile ?
R : For a direct plug-and-play replacement, it’s a 1 sur 5 sur l'échelle de difficulté — un simple bricolage nécessitant des outils basiques et 20 à 30 minutes. Installer un kit complet 3-en-1 avec un nouvel interrupteur sur le guidon est plus complexe, se classant autour de 3 sur 5, car il nécessite un cheminement soigneux des câbles et un montage de l'interrupteur, mais reste tout à fait réalisable pour un débutant patient.
Q5 : Existe-t-il des options de feu arrière étanches pour l'Ultra Bee ?
R : Absolument. C'est une caractéristique clé à rechercher. Privilégiez les feux du marché secondaire avec un indice de Protection contre les Intrusions (IP) élevé.. IP67 est une excellente norme pour un usage tout-terrain, signifiant qu'il est étanche à la poussière et peut résister à une immersion dans 1 mètre d'eau pendant 30 minutes maximum.
Conclusion
Your Surron Ultra Bee’s tail light is a cornerstone of responsible riding. It’s a critical élément de sécurité critique qui vous rend visible et une nécessité légale for road use. As we’ve explored, whether you’re performing a simple repair or a feature-rich upgrade, the process hinges on choosing a quality product that matches your riding style and installing it correctly.
Améliorer votre Surron Ultra Bee tail light est l'une des modifications les plus pratiques et les plus impactantes que vous puissiez réaliser. Elle augmente directement votre marge de sécurité sur la route et les sentiers, vous protégeant du plus grand danger : ne pas être vu. En utilisant ce guide pour comprendre vos options, comparer les caractéristiques et suivre les étapes d'installation, vous pouvez garantir une solution d'éclairage fiable, lumineuse et conforme.
Avant d'acheter, consultez la réglementation locale, achetez auprès de vendeurs réputés offrant un bon support, et évaluez honnêtement vos besoins — est-ce pour du pur frime tout-terrain ou pour un trajet urbain quotidien ? Faites votre choix en conséquence. Avez-vous installé un nouveau feu arrière sur votre Ultra Bee ? Partagez votre expérience ou vos questions dans les commentaires ci-dessous pour contribuer à notre savoir collectif !
METADATA_START—
DISPLAY_TITLE : Le Guide Ultime du Feu Arrière Surron Ultra Bee
SEO_TITLE : Guide du Feu Arrière Surron Ultra Bee : Sécurité, Améliorations, Installation | E-E-A-T
META_DESC : Guide complet du feu arrière Surron Ultra Bee. Découvrez les spécifications d'origine, les meilleures améliorations après-vente pour visibilité et durabilité, l'installation étape par étape et les FAQ légales. Bricolez en toute sécurité.
IMG_PROMPT : Une photo détaillée et bien éclairée, en gros plan, de l'arrière d'un Surron Ultra Bee, un dirt bike électrique, mettant l'accent sur un feu arrière et un feu stop LED brillants, sur un fond de garage ou de sentier flou. La moto est propre, avec des outils comme des clés Allen à proximité, évoquant un contexte d'installation DIY.
—METADATA_END—