The Complete Guide to Sur Ron Turn Signal Kits: Safety, Legality & Installation
해당 모델의 Sur Ron electric bike has ignited a revolution. From mountain trails to urban streets, a vibrant community of riders is discovering the unique thrill of these powerful, lightweight machines. But as we take our Sur Rons beyond private land and onto shared paths and public roads, a critical gap emerges: communication. Unlike traditional motorcycles, many Sur Ron models roll off the assembly line without one of the most fundamental safety features—방향지시등.
This isn’t just about adding another cool mod; it’s about bridging a significant safety and legal divide. Riding without clear signals is like driving a car with non-functioning brake lights—you’re operating without a key tool to tell others what you’re about to do. As enthusiasts who have installed and tested multiple kits on our own bikes, we’ve created this comprehensive guide. Our goal is to combine hands-on installation experience, a clear understanding of legal requirements, and unbiased product insights. Whether you’re aiming for full street legality or simply want to be a more predictable and visible rider, this guide will walk you through everything you need to know about choosing and installing a Sur Ron turn signal kit.
Why a Turn Signal Kit is Essential for Your Sur Ron
Before diving into wiring harnesses and LED specs, it’s crucial to understand the why. Installing turn signals is arguably one of the most responsible upgrades you can make, impacting your safety, your legal standing, and your overall riding experience.
Enhancing Rider Safety on Roads and Trails
On the road, you are sharing space with vehicles that are larger, faster, and often operated by distracted drivers. Your primary defense is predictability. Hand signals, while better than nothing, are often missed, especially at night, in poor weather, or when you need your hands for control. A bright, flashing turn signal is an unambiguous declaration of your intent to change lanes or turn.
The principle is simple: clear communication prevents accidents. It tells the car behind you that you’re slowing to turn, alerts oncoming traffic at an intersection, and warns cyclists and pedestrians on shared trails. Off-road, on busy multi-use trails, signals can prevent head-on collisions in blind corners and communicate your direction to riding buddies. It transforms you from an unpredictable object into a recognized vehicle with intentions.
Meeting Local Legal and Registration Requirements
For many riders, this is the non-negotiable driver. If your ambition is to make your Sur Ron 도로 주행 가능(법적 요건 충족), turn signals are almost certainly a mandatory requirement. Vehicle codes in most U.S. states, Canadian provinces, and European countries stipulate that any motorcycle or motorized bicycle operating on public roads must be equipped with functioning turn signals (often specifying minimum distances between them, height, and color—amber front, red or amber rear).
Trying to register or pass a safety inspection without them is a non-starter. We strongly advise every rider to consult their local Department of Motor Vehicles (DMV) or Ministry of Transport (MOT) regulations. The rules vary widely—some areas may require DOT/SAE-approved lighting, while others have more generic requirements. A proper Sur Ron turn signal kit is the foundational step in building a compliant machine.
Increasing Your Bike’s Visibility Day and Night
A Sur Ron is relatively small and quiet. This is part of its charm but also a vulnerability. Integrated turn signals dramatically increase your bike’s visual footprint. They act as additional marker lights, making you more conspicuous from the side and front during the day. At night, they are indispensable. A flashing amber light in a driver’s periphery is highly effective at grabbing attention, complementing your headlight and brake light to create a full 360-degree lighting signature. This isn’t just about being seen when turning; it’s about being seen, period.
Key Features to Look for in a Quality Sur Ron Turn Signal Kit
The market offers everything from cheap, generic universal kits to well-engineered, model-specific solutions. Knowing what separates a good kit from a bad one will save you time, money, and frustration.
Plug-and-Play vs. Universal Wiring Harnesses
This is the most critical distinction.
* Plug-and-Play (Model-Specific): These kits are designed for a specific Sur Ron model (e.g., Light Bee X, Storm Bee). The wiring harness includes connectors that mate directly with existing plugs in your bike’s wiring loom, typically tapping into the rear brake light for power. Installation requires minimal to no wire cutting or splicing, drastically reducing the chance of error and making the process reversible. This is our top recommendation for most users due to its simplicity and reliability.
* Universal Kits: These are generic motorcycle turn signal kits. They include lights, a switch, and a length of wire. You are responsible for routing everything, finding a power source (usually by splicing into the battery or another circuit), and making all connections waterproof. They offer more flexibility and are often cheaper but require significantly more electrical knowledge, time, and effort to install cleanly and safely.
LED Technology: Brightness, Durability, and Power Draw
For an electric bike, LEDs are the only sensible choice.
* Brightness & Visibility: Look for kits that use high-lumen LEDs. Brightness is key for daytime visibility. Many quality kits now use multi-chip LED arrays for a wide, even illumination.
* Durability: LEDs are solid-state, meaning they have no fragile filaments. They are inherently resistant to vibration—a major plus for off-road use. Ensure the housing has a good Ingress Protection (IP) rating (e.g., IP67) for water and dust resistance.
* Low Power Draw: This is crucial. LEDs consume a fraction of the power of incandescent bulbs. This places minimal strain on your Sur Ron’s relatively small battery system, ensuring your lights won’t significantly impact your ride time.
Switch Assembly Design and Ergonomics
You’ll be using this switch constantly while riding, so its design matters. A good switch assembly should:
* Mount cleanly to your handlebars without interfering with other controls.
* Have a intuitive, tactile feel. You should be able to engage left/right signals and cancel them without looking down.
* Be robust enough to withstand weather and occasional impacts. Cheap, plasticky switches can break or become unresponsive.
Included Components: From Flashers to Mounting Hardware
A complete Sur Ron turn signal kit should include:
* Front and Rear Turn Signals: Usually 2-4 lights total.
* Handlebar Switch Assembly: With cancel and often a hazard light function.
* Wiring Harness: The main nervous system of the kit.
* Flasher Relay/Module: This creates the blinking pattern. For LED kits, this 순수히 미용적인 그래픽은 일반적으로 합법입니다. 그러나 be an LED-compatible electronic flasher. A standard thermal relay will cause “hyper-flashing.”
* All Necessary Connectors: T-taps, bullet connectors, or OEM-style plugs.
* Quality Mounting Hardware: Stainless steel or high-grade bolts, nuts, and brackets that won’t rust or shear off from vibration.
Step-by-Step Installation Guide for a Sur Ron Turn Signal Kit
Here’s a generalized guide based on installing several plug-and-play kits. Always refer to your specific kit’s instructions first.
Tools and Preparation You’ll Need
Gather these before you start:
* Hex key/Allen wrench set (metric).
* Wire strippers and crimpers.
* Electrical tape and/or heat shrink tubing.
* Zip ties and wire loom (optional, for extra protection).
* Multimeter (for troubleshooting).
* SAFETY FIRST: Locate and disconnect your Sur Ron’s main battery. This prevents shorts, sparks, or accidental controller damage.
Mounting the Front and Rear Turn Signals
Plan your placement. For legality and visibility:
* Front Signals: Mount on or near the handlebars, fork legs, or a front fender bracket. Ensure they are symmetrical, visible from the front and side, and won’t interfere with suspension travel or steering.
* Rear Signals: Often mount near the seat or on the rear fender/rack. They must be visible from the rear and side. Many kits include specific brackets that mount under the seat bolt.
Avoid placing wires where they will be pinched, stretched, or exposed to direct heat from the motor.
Routing the Wiring Harness Neatly and Securely
A clean install is a reliable install. Follow the bike’s existing wire looms. Use the frame’s internal channels or gaps where possible. Secure the harness every few inches with zip ties, but don’t overtighten. Protect wires that pass near sharp edges with a piece of split loom or rubber grommet. The goal is to have everything look OEM and be protected from abrasion.
Connecting to Power and the Brake Light System
This is the core of a plug-and-play install.
1. Locate the connector for your rear brake light (usually under the seat or near the battery).
2. Your kit’s harness will have a corresponding plug. Simply connect them. This splice typically draws power only when the bike is on.
3. For universal kits, you must identify a switched 12V power source (often using a multimeter) and make a secure, soldered, and waterproof connection.
4. Connect the switch to the harness, and run the wires to each turn signal light, connecting them as per the instructions.
5. Ground the system. There will be a ground wire that must be securely attached to a clean, bare metal point on the bike’s frame.
Testing and Troubleshooting Common Issues
Reconnect the battery. Before finalizing everything, test all functions:
* Turn on the bike. Activate the left and right signals. Do they flash at a normal rate?
* Test the cancel function on the switch.
* Test the hazard lights (if equipped).
* Check that the brake light still operates independently.
Common Issues:
* Hyper-flashing (Very Fast Blinking): This is normal for LEDs connected to a system expecting old bulbs. Solution: Ensure you’re using the LED-compatible flasher relay that came with the kit. If not included, you’ll need to purchase one or install load resistors in line with each turn signal.
* No Lights On One Side: Check the connection at the switch and the bulb. Use a multimeter to check for voltage.
* Lights On But Not Flashing: The flasher relay is likely faulty or not connected properly.
Top Sur Ron Turn Signal Kit Considerations & Recommendations
Compatibility with Your Specific Sur Ron Model and Year
A kit for a 2020 Light Bee may not fit a 2023 Light Bee X due to changes in the frame and wiring loom. Double-check the manufacturer’s compatibility listing. The Storm Bee, with its different lighting setup, will also require a specific kit. Buying the wrong one means a headache of returns or modifications.
Balancing Cost with Quality and Completeness
Kits range from $50 to over $200.
* Budget (<$80): Often universal or “semi-universal” kits. May have weaker switches, thinner wiring, and lack a proper plug-and-play harness. Suitable for tinkerers on a tight budget.
* Mid-Range ($80-$150): This is the sweet spot for quality plug-and-play kits. They include robust components, good LEDs, a proper harness, and clear instructions. Brands like Kaniwaba often operate here.
* High-End ($150+): Often feature ultra-bright LEDs, CNC-machined aluminum housings, and may integrate with advanced lighting controllers or come as part of a full street-legal kit (with horn, mirrors, etc.).
Popular Kit Brands and Community Feedback
Based on sustained forum and user group feedback (always check the most recent reviews yourself):
* Kaniwaba Kits: Frequently mentioned for their good quality, clear instructions, and model-specific plug-and-play designs for the Light Bee X.
* KTM/Husqvarna Style Universal Kits: These are popular universal options that offer a clean, OEM motorcycle look. They require more installation work but are highly regarded for durability.
* Custom eBay/Amazon Listings: Many sellers offer kits that are rebranded generic products. Scrutinize reviews and photos of the actual components, especially the switch and connectors.
Integrating with Existing Mods: Mirrors, Controllers, and Batteries
Think of your turn signal kit as part of an ecosystem. Ensure handlebar real estate for the switch if you have a thumb throttle, display, and mirrors. If you’ve upgraded your controller or battery, the electrical principles remain the same—you’re still tapping into a switched 12V circuit. A clean install ensures your new mods work in harmony.
FAQ 섹션
Q: Is a turn signal kit necessary if I only ride off-road?
A: While not legally required, it remains an excellent safety tool. On crowded OHV trails or when riding in groups, clear signals can prevent collisions and improve group communication, especially in dust or low light.
Q: Can I install a turn signal kit myself without electrical experience?
A: Yes, if you choose a true plug-and-play kit and are patient and methodical. The process is more about careful routing and following instructions than complex electrical work. If the thought of handling wires makes you nervous, a local motorcycle or e-bike mechanic can complete the install quickly.
Q: Will installing a kit void my Sur Ron’s warranty?
A: It should not void the warranty on the entire bike. However, if you damage the stock wiring harness or controller during installation, the warranty on those specific components could be voided. Using a plug-and-play kit that avoids cutting OEM wires is the safest approach. Always review your warranty terms.
Q: How do I make my Sur Ron completely street legal?
A: Turn signals are one component. Full street legality typically requires: a horn, at least one mirror (often two), a DOT-approved headlight and taillight/brake light, a valid vehicle title/registration, and license plate. Requirements vary 현저하게 도시, 주 및 국가별로. 귀하의 지역 법규를 철저히 조사해야 합니다.
Q: 새로 설치한 LED 방향지시등이 매우 빠르게 깜박입니다. 어떻게 고칠 수 있나요?
A: 이것은 “과속 점멸(하이퍼-플래싱)” 현상입니다. 해결 방법은 LED 호환 전자식 플래셔 릴레이를 설치하는 것(가장 좋은 해결책)이거나 각 방향지시등 회로에 부하 저항기를 추가하는 것입니다. 릴레이 방식이 더 깔끔하며 저항기처럼 과도한 열을 발생시키지 않습니다.
결론
설치하는 것은 Sur Ron turn signal kit 단순한 액세서리 추가가 아닙니다. 이것은 당신의 바이크 안전성, 기능성 및 합법성을 근본적으로 업그레이드하는 것입니다. 도시 거리나 붐비는 산길을 주행할 때, 당신의 라이드를 개인적인 장난감에서 더 능력 있고 의사소통이 가능한 탈것으로 변화시킵니다. 특히 잘 선택된 플러그 앤 플레이 키트를 사용한다면, 이 과정은 자신감과 보호 측면에서 보상을 주는 실현 가능한 프로젝트입니다.
고품질 키트를 우선시하고, 설치에 시간을 충분히 들이며, 당신의 설정이 지역 규정을 준수하도록 함으로써, 당신은 앞으로 수많은 더 안전한 주행에 투자하는 것입니다. 연구를 하고, 연결을 다시 한번 확인하고, 모든 여정에서 명확하게 의사소통하기 위해 당신의 역할을 다하고 있다는 사실에서 오는 마음의 평화를 즐기십시오. 자, 이제 나가서 눈에 띄고 안전하게 라이딩하세요.
메타데이터_시작—
DISPLAY_TITLE: 서론(Sur Ron) 방향지시등 키트 완벽 가이드: 안전성, 합법성 및 설치
SEO_TITLE: 서론(Sur Ron) 방향지시등 키트 가이드: 안전 및 도로 합법성을 위한 설치
META_DESC: 서론(Sur Ron) 방향지시등 키트 필수 가이드. 필요한 이유, 최고의 키트 선택 방법을 알아보고, 더 안전하고 도로 주행이 합법적인 라이딩을 위한 단계별 설치 가이드를 따라하세요.
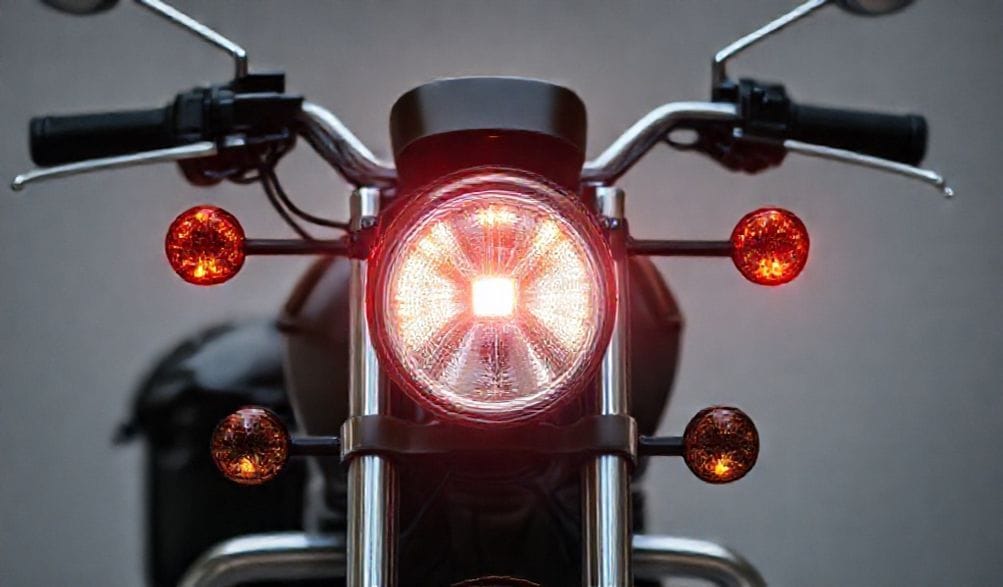
IMG_PROMPT: 세련된 애프터마켓 LED 방향지시등 키트가 장착된 서론(Sur Ron) 라이트 비 X 전기 자전거의 근접 촬영된 디테일 사진. 자전거는 차고 환경에 있으며, 전면 호박색 방향지시등이 밝게 점등되어 있습니다. 배경 작업대에는 육각 키, 와이어 크림퍼 같은 도구들이 정리되어 놓여 있어 DIY 설치를 암시합니다.
—METADATA_END—