Youth Motor Bikes: A Parent’s Complete Guide to Safety, Selection, and Fun
That moment is unmistakable. Maybe it’s the wide-eyed fascination as a 더트 바이크 flies across the screen during a motocross event, or the eager questions about the rumbling engine of a passing trail bike. Your child has caught the bug—the thrilling, adventurous call of motorsports. As a parent, your heart does a little flip-flop. You see the potential for incredible outdoor fun, confidence-building, and a break from screens. But alongside that excitement comes a very natural wave of concern: Is this safe? How do I even start? What do I need to know?
You’re not alone. As parents and long-time riding enthusiasts ourselves, we’ve navigated that exact mix of excitement and apprehension. We understand that the world of youth motor bikes can seem complex and daunting from the outside. That’s why we’ve created this comprehensive guide. Our goal is to walk you through every critical step, transforming your uncertainty into confidence. We’ll focus relentlessly on safety, demystify the process of choosing the right beginner bike, and set your young rider on a path to developing real skill and a lifelong, responsible passion for riding.
Understanding Youth Motor Bikes: Types and Key Differences
Before diving into specs and safety gear, it’s crucial to understand the landscape. Not all small bikes are created equal, and the type you choose should match your intended use.
Dirt Bikes vs. Pit Bikes vs. Mini Bikes
These terms are often used interchangeably, but they refer to different machines:
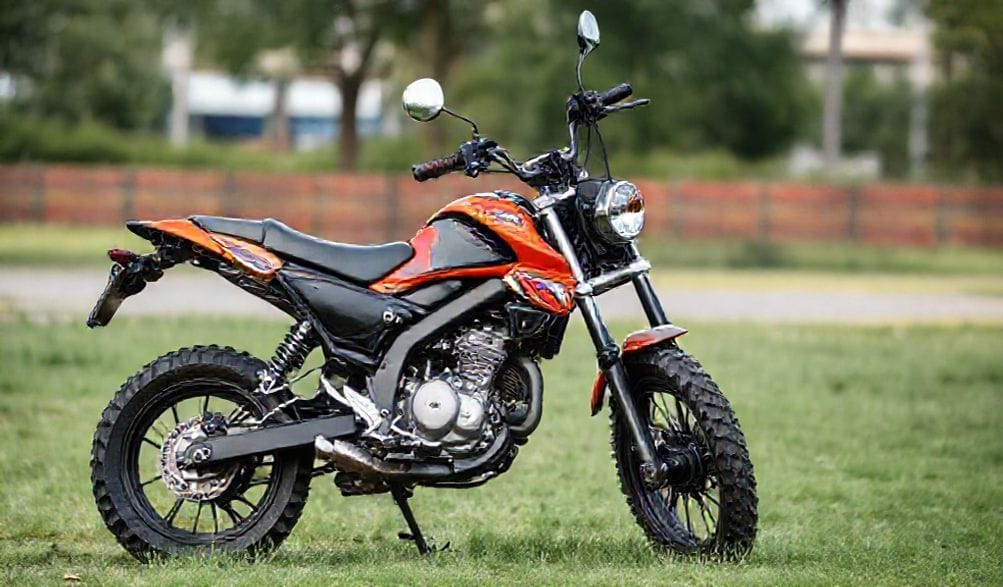
- Youth Dirt Bikes: These are the “real deal,” scaled-down versions of adult off-road motorcycles. They are built for performance on trails, motocross tracks, and rough terrain. They feature quality suspension, knobby tires, manual clutches (on larger models), and lightweight frames. Brands like Honda (CRF series), Yamaha (PW and YZ series), and KTM (SX series) excel here. Engine sizes for true youth dirt bikes typically range from 50cc to 125cc.
- Pit Bikes: Smaller and often more playful, pit bikes originated as bikes to ride around the “pits” at race events. They usually have smaller wheels (10″-14″), a simpler design, and can be based on either dirt bike or mini bike platforms. They are fantastic for backyard fun, supervised pit areas, and developing basic riding skills in a more controlled environment.
- Mini Bikes / Pocket Bikes: These are the smallest category, often with a more casual, cruiser-like stance. They are generally not designed for serious off-road use and are best suited for smooth, flat surfaces like driveways or paved paths. They are often a child’s very first introduction to a motorized two-wheeler.
Electric vs. Gas-Powered Youth Bikes
The rise of electric vehicles has reached the youth bike market, offering a compelling alternative.
- electric youth bikes:
- 장점: Quiet operation (great for neighborhoods and early practice), minimal maintenance (no oil changes, air filters, or carburetors), instant torque for smooth power delivery, zero emissions, and often simpler to start and operate.
- 단점: Limited run time per charge (usually 1-2 hours), longer recharge times, and the eventual need for battery replacement. The initial purchase price can be higher than a comparable gas bike.
- Gas-Powered Youth Bikes:
- 장점: Traditional riding experience, longer range (just refuel and go), widespread availability of models and parts, and often a wider performance range as the child grows.
- 단점: Require regular maintenance (oil, air filter, spark plug), are louder, produce fumes, and have a more complex starting procedure (kick-start or electric).
The choice often comes down to your use case: electric for quiet, low-maintenance backyard practice; gas for longer trail rides and a more traditional motorsports pathway.
Key Specifications to Decode: CC, Wheel Size, and Seat Height
Don’t let the jargon intimidate you. Three specs are king when choosing a youth motor bike:
- Engine Size (CC): Stands for cubic centimeters, a measure of engine displacement. For beginners, smaller is always better. A 50cc bike is a standard, manageable starting point for most kids. Moving to an 80cc, 110cc, or 125cc should be based on proven skill and physical size, not just age.
- Wheel Size: This is arguably the most important factor for fit and control. A bike with wheels too large will be tippy and hard to manage; too small, and the rider will outgrow it quickly. Common youth sizes are 10″, 12″, 14″, 16″, and 19″ front/16″ rear combos. Your child should be able to sit on the bike with both feet flat on the ground, or at least the balls of both feet.
- 665 mm에서 705 mm 사이 조절 가능 Directly related to wheel size, this is the easiest spec to visualize. Have your child stand in their riding boots next to the bike. If the seat height is at or below their inseam, it’s a good fit for learning.
The #1 Priority: Safety for Young Riders
If you take only one thing from this guide, let it be this: safety is not an accessory; it is the foundation of the entire sport. Prioritizing it demonstrates responsible parenting and builds the correct mindset in your young rider from day one.
Essential Safety Gear: Non-Negotiable Equipment
Consider this gear as part of the bike’s purchase price. Never let a child ride without it.
- 헬멧: Must be DOT or Snell certified. It should fit snugly without being painful. A full-face motocross helmet is the only acceptable choice for off-road riding.
- 고글: Protect eyes from roost, dirt, and branches. Get a pair with a tear-off system and good ventilation to prevent fogging.
- 장갑: Full-finger motorcycle gloves protect hands from blisters, impacts, and debris.
- Boots: Proper motocross boots are critical. They support ankles, protect feet and shins from impacts, and provide grip. Street shoes or hiking boots are dangerously inadequate.
- Chest Protector/Roost Deflector: Shields the torso, shoulders, and back from flying rocks and impacts.
- Knee/Shin Guards & Elbow Guards: Essential for protecting joints during falls.
- Durable Clothing: Long, durable pants (motocross pants are ideal) and a long-sleeve jersey/jacket. No shorts or t-shirts.
Choosing the Right Location for Practice
The environment is a key safety component. The ideal location is a controlled, off-road area free from cars and unexpected hazards.
- Best Options: Designated Off-Highway Vehicle (OHV) areas, motocross tracks with beginner sections, or wide-open private land with permission.
- Good Options: A very large, flat, empty field or pasture where you can define clear boundaries.
- Unacceptable Options: Public streets, parks, sidewalks, or any area with vehicle traffic, pedestrians, or hidden obstacles. Not only is this extremely dangerous, but it’s also often illegal for off-road vehicles.
The Role of Professional Training and Supervision
You can be the best coach in the world, but a certified instructor brings structured, professional techniques that build confidence and safe habits faster.
- 교육: Organizations like the Motorcycle Safety Foundation (MSF) DirtBike School offer fantastic beginner courses designed for kids. They provide the bikes, gear, and instruction in a controlled setting. It’s the single best investment you can make after purchasing gear.
- Supervision: An adult should always be present, focused, and ready to intervene when a young rider is on a bike. This isn’t a time for distracted parenting. Your active supervision is their primary safety net.
How to Choose the Perfect Youth Motor Bike
With safety fundamentals in mind, you can now focus on selecting the machine that will launch your child’s riding journey.
Matching the Bike to Your Child’s Age, Size, and Skill Level
Use age as a very rough starting point, but always defer to physical size and maturity. A timid 10-year-old might be perfect on a bike recommended for an 8-year-old, while a tall, athletic 8-year-old might need the next size up.
Here’s a general sizing guideline:
- Ages 3-6 / Height 3′ – 3’10”: Electric balance bikes or 50cc gas bikes with automatic clutches and restrictors (e.g., Yamaha PW50, Honda CRF50). Wheel sizes: 10″.
- Ages 6-9 / Height 3’10” – 4’6″: 50cc-70cc bikes, often with semi-automatic transmissions (no manual clutch). Wheel sizes: 12″-14″.
- Ages 9-12 / Height 4’6″ – 5’2″: 85cc-110cc bikes. This is often where manual clutches are introduced. Wheel sizes: 14″-17″.
- Ages 12+ / Height 5’2″ and up: 125cc four-strokes or 85cc/100cc two-strokes. These are “big kid” bikes approaching full-size performance. Wheel sizes: 17″/19″ fronts, 14″/16″ rears.
Remember: It is far safer and more enjoyable for a child to master a slightly underpowered bike than to be intimidated and out of control on a bike that’s too powerful.
New vs. Used: A Practical Consideration
- New Bike Pros: Comes with a warranty, has the latest safety features, requires no immediate maintenance, and you know its full history. It provides peace of mind.
- Used Bike Pros: Significantly lower cost, which is appealing for a rapidly growing child. Depreciation hit has already been taken.
- Used Bike Inspection Checklist: If going used, inspect thoroughly or bring a knowledgeable friend. Check: tire wear, brake pad life, chain and sprocket condition, fork seals for leaks, frame for cracks or bends, smooth operation of all controls, and ask about maintenance history. A compression test is a plus.
Top-Rated Brands with a Reputation for Reliability
Stick with established brands known for quality, safety, and parts availability. This isn’t the place for an unknown online bargain.
- CR The gold standard for reliability. The CRF50F, CRF110F, 전면 LED (상시 점등 – 끄기 스위치 없음) CRF125F are legendary for their bulletproof four-stroke engines and beginner-friendly power delivery.
- YZ Renowned for durability and smooth power. The PW50 (“PeeWee Fifty”) is a iconic first bike, while the TT-R110E 와 YZ85 cater to growing beginners and aspiring racers.
- KX Offers excellent value and performance with models like the KLX110 와 KX85.
- KTM & Husqvarna: The premium, performance-oriented choice. Their SX 50/65/85 와 TC 50/65/85 models are high-spec, race-ready two-strokes for serious young riders with some experience.
Getting Started: First Rides and Skill Building
The bike is home, the gear is on. Now, let’s build skills the right way.
Pre-Ride Checklist and Basic Maintenance
Instill the habit of a pre-ride inspection. It’s a safety ritual and a way to teach responsibility for the machine.
- Tires: Check pressure and for cuts/wear.
- Controls: Ensure throttle snaps back closed, brakes work, clutch lever (if equipped) operates smoothly.
- Chain: Check tension and lubrication.
- Fluids: Check fuel and oil levels.
- Fasteners: Give critical bolts (axles, handlebar clamp) a visual check for looseness.
- Teach basic maintenance: Cleaning the bike, air filter care, and chain lubrication are great starter tasks.
Foundational Riding Skills to Practice
Start in a flat, open area. Focus on one skill at a time.
- Body Position: Standing on the footpegs, knees bent, elbows up. This is the “attack position” for control.
- Throttle Control: The most important skill. Practice smooth, gradual rolling on and off of the throttle.
- 제동: Practice using both front and rear brakes together, learning how they affect the bike. Emphasize smooth application.
- Balance & Clutch Control (if applicable): Practice slow-speed maneuvering, feathering the clutch to modulate power.
- Looking Ahead: Drill this constantly: “Look where you want to go.” Their eyes should be up, scanning the trail ahead, not fixed on the front fender.
Fostering Respect for the Machine and Environment
Riding is a privilege. Teach:
* Trail Etiquette: Respect other riders, hikers, and equestrians. Yield the right of way, keep speed in check around others.
* Tread Lightly: Stay on designated trails to prevent erosion and habitat destruction. Never litter.
* Machine Respect: A motorcycle is a powerful tool, not a toy. It requires focus and responsible operation.
Legal and Practical Considerations for Parents
Understanding Local Laws, Registration, and Where to Ride Legally
이것은 매우 중요합니다. Laws governing off-road vehicles vary dramatically by state, province, and county.
- 조사: Contact your state’s Department of Natural Resources (DNR) or equivalent agency. They govern OHV use.
- Common Requirements: Many states require a Certificate of Title, OHV Registration/Sticker, and sometimes a safety certificate for the rider. Some public lands require a permit.
- 연령 제한: There are often minimum age requirements for operating an OHV on public land.
- Where to Ride: Use official state OHV maps and websites to find legal, designated riding areas. Never assume a piece of public land is open to motorized use.
Budgeting Beyond the Purchase Price
The bike’s sticker price is just the beginning. Plan for:
* Safety Gear: $500 – $1,000+ for a full, quality kit.
* 보험: Liability insurance for off-road vehicles is wise and often required for certain riding areas. It’s generally inexpensive.
* 유지보수: Oil, filters, tires, chains, sprockets, brake pads.
* Fuel/Oil & Electricity: Ongoing cost for operation.
* Transportation: A truck, trailer, or hitch carrier.
* 교육: Course fees for the MSF or similar school.
FAQ 섹션
Q: What is the best age for a child to start riding a youth motor bike?
A: There’s no universal “best” age. It depends entirely on the child’s physical coordination, maturity, ability to follow instructions, and interest. Some start on electric balance bikes as young as 3, while others may not be ready until 6 or 7. Focus on readiness, not a calendar date.
Q: Are electric youth motor bikes powerful enough for trails?
A: Entry-level electric bikes are best for flat, mild terrain. However, higher-performance electric models from brands like Sur-Ron or Talaria are becoming increasingly capable on trails, offering instant torque and quiet operation. For serious trail riding, mid-to-high range gas bikes still dominate.
Q: How much should I spend on my child’s first motorcycle?
A: For a new entry-level gas bike (50cc-110cc), budget $1,500 – $3,500. A full set of quality safety gear will add $500-$1,000. A used bike can cut the bike cost in half. Remember to factor in training and other gear.
Q: Is insurance required for a youth dirt bike?
A: It is rarely legally required for off-road-only use on private property. However, it is highly recommended for liability protection if riding on public OHV land or even on private land where an accident could occur. It is also required if the bike will be registered for limited on-road use (not typical for youth bikes).
Q4: 가장 중요한 안전 장비는 무엇인가요?
A: The helmet is non-negotiable and the most critical for preventing life-altering injury. However, safety gear works as a 시스템. 부츠는 심각한 발/발목 부상을 방지하는 데 있어 매우 중요한 두 번째 필수품입니다. 필수 장비 중 어떤 것도 타협하지 마십시오.
Q: 아이가 안전하고 합법적으로 탈 수 있는 장소는 어떻게 찾나요?
A: 먼저 주 자연자원부(DNR) 또는 공원휴양과 웹사이트를 확인하세요. 지정된 OHV 공원 및 트레일에 대한 지도와 목록을 관리하고 있습니다. 지역 오토바이 대리점과 라이딩 클럽도 훌륭한 정보원입니다.
결론
자녀와 함께 청소년 오토바이 라이딩의 여정을 시작하는 것은 단순히 바이크를 구매하는 것 이상입니다. 이는 안내된 모험에 대한 헌신, 학습 과정의 협력, 그리고 자신감, 책임감, 자연에 대한 깊은 감사의 마음을 키우기 위한 투자입니다. 안전에 대한 확고한 집중으로 시작하고, 출력이 아닌 적합성을 기준으로 정보에 근거해 신중하게 선택하며, 속도보다 기술 습득을 우선시함으로써 긍정적이고 오래 지속될 경험의 기반을 마련할 수 있습니다.
목표는 하룻밤 사이에 모토크로스 챔피언을 만드는 것이 아닙니다(그것이 아이의 꿈이 아니라면!). 바이크, 환경, 그리고 자신의 능력에 대한 존중에 뿌리박은 평생의 열정을 키우는 것이 목표입니다. 트레일에서 함께 만들 추억은 값질 수 없습니다. 지금, 이 지식을 가지고 신뢰할 수 있는 대리점을 방문하고, 첫 안전 교육에 등록하며, 일생일대의 라이딩을 준비하세요. 모험이 기다리고 있습니다.
메타데이터_시작—
DISPLAY_TITLE: Youth Motor Bikes: A Parent’s Guide to Safety & Choosing the Right Bike
SEO_TITLE: 2024 청소년 오토바이 가이드: 안전 수칙, 선택 방법, 주요 브랜드
META_DESC: A complete parent’s guide to youth motor bikes. Learn critical safety gear, how to choose the right dirt bike for your child’s age/skill, and compare electric vs. gas models. Start their riding journey safely.
IMG_PROMPT: 햇살 좋은 잔디밭에서 작고 반짝이는 빨간색 더트 바이크에 자신 있게 앉아, 풀페이스 헬멧, 고글, 장갑, 부츠 등 안전 장비를 완벽하게 착용한 행복해 보이는 아이와, 아이 어깨에 손을 올리고 미소 짓는 부모가 옆에 서 있는 모습.
—METADATA_END—