The Ultimate Guide to Surron Sprockets: Performance, Gearing & Installation
If you’re reading this, you’ve likely felt the incredible potential of your Surron Light Bee or Storm Bee and are now looking to unlock more of it. In the world of electric dirt bike performance, few modifications are as cost-effective and transformative as changing your Surron sprocket. Yet, it’s also one of the most misunderstood. Marketing claims can be vague, and forum advice is often contradictory.
This guide is different. It’s written from the grease-stained hands of the electric bike community, combining mechanical principles with hundreds of hours of real-world testing and rider feedback. We’re here to cut through the noise. We’ll explain not just how to change a sprocket, but why you’d want to, and what you can realistically expect in terms of acceleration, top speed, and even battery life. Whether your goal is conquering steep hill climbs, shaving seconds off a motocross lap, or extending your urban commute’s range, choosing the right sprocket is your first, most crucial step.
Understanding Sprocket Fundamentals: More Than Just a Cog
Before you buy a single part, it’s essential to understand the role this simple-looking component plays in your bike’s performance. A sprocket isn’t just a cog; it’s the final translator between your motor’s raw power and the ground.
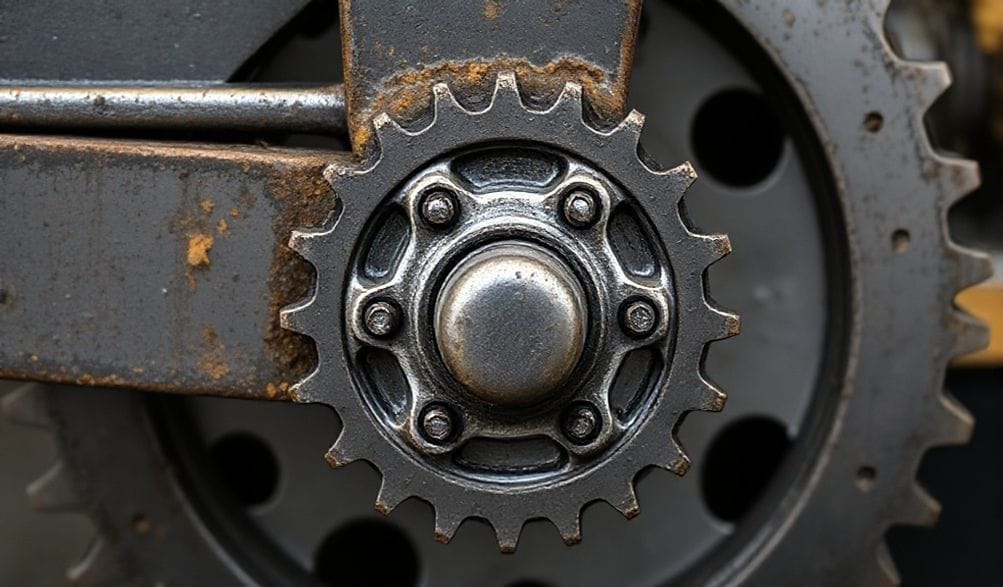
What is a Sprocket and How Does it Work on a Surron?
Think of your Surron’s drive system as a sophisticated bicycle. The electric motor spins a small countershaft (front) sprocket. This sprocket engages the chain, which turns the much larger rear sprocket bolted to your wheel hub. That rear sprocket’ rotation is what ultimately propels your bike forward.
A few key terms to know:
* Tooth Count (T): The number of teeth on the sprocket. This is the primary number you’ll change (e.g., 46T, 48T, 50T).
* Pitch: The size and spacing of the chain links. Surrons use a 420 chain pitch as standard. Any sprocket you buy must match this specification.
* Material: Typically steel or aluminum, each with significant trade-offs we’ll explore later.
The Critical Role of Gearing Ratios
The relationship between the front and rear sprocket sizes is called the final drive ratio. It’s calculated simply as:
Final Drive Ratio = (Rear Sprocket Teeth) / (Front Sprocket Teeth)
For a stock Surron Light Bee X with a 14T front and 46T rear sprocket, the ratio is 46 / 14 = 3.29.
This number is the magic key. Here’s what it means:
* Higher Ratio (More Rear Teeth / Fewer Front Teeth): The motor has to work “harder” per wheel revolution, multiplying torque. This results in brutal acceleration, better hill-climbing, and easier wheelies, but at the cost of lower top speed and potentially more battery draw at high RPM.
* Lower Ratio (Fewer Rear Teeth / More Front Teeth): The motor works “easier” per wheel revolution. This increases potential top speed and can improve cruising efficiency, but reacceleration and low-speed torque will feel softer.
| Common Surron Combo | Final Drive Ratio | Primary Effect | Best For… |
| :— | :— | :— | :— |
| 14T / 46T (Stock) | 3.29 | Balanced Performance | General riding, factory setup |
| 14T / 48T | 3.43 | +4% Torque, -4% Top Speed | Technical trails, more playful power |
| 14T / 50T | 3.57 | +9% Torque, -9% Top Speed | Extreme hill climbs, slow technical |
| 15T / 46T | 3.07 | -7% Torque, +7% Top Speed | Street commuting, higher top speed |
Choosing the Right Surron Sprocket: A Data-Driven Decision
Now that you understand the “why,” let’s match the theory to your reality. The best Surron sprocket for you depends entirely on where and how you ride.
Assessing Your Riding Style & Terrain
-
Trail & Technical Enduro Riding: For tight woods, rocky climbs, and muddy ruts, you want maximum control. Lower gearing (more teeth on the rear, e.g., 48T or 50T) is king. It allows you to crawl over obstacles without clutching (or the electric equivalent: feathering the throttle), provides explosive power out of corners, and makes the bike feel more manageable at slow speeds. The reduced top speed is irrelevant on single-track.
-
Motocross & Track Riding: This requires a balance. You need strong acceleration out of corners and for jump faces, but also enough top speed to clear long straights. Most track riders find a modest change from stock works well—often a +1 or +2 tooth rear sprocket (47T or 48T). This sharpens acceleration without sacrificing too much top-end, keeping the motor in its powerband through rhythm sections.
-
Street & Urban Commuting: If you’re using your Surron on pavement, top speed and efficiency often take priority. Higher gearing (fewer teeth on the rear or a larger front, e.g., 15T/46T) lowers the motor’s RPM at a given road speed. This reduces whine, can extend battery range during steady cruising, and increases your theoretical top speed (though wind resistance becomes the limiting factor).
Sprocket Material Showdown: Steel vs. Aluminum
Once you’ve chosen your tooth count, you must choose the material. This is a classic durability vs. performance decision.
-
Steel Sprockets: The Workhorse.
- Pros: Exceptional durability and wear resistance. A quality steel Surron sprocket can last thousands of miles, even in abrasive sandy or muddy conditions. They are less prone to deformation and are generally more affordable.
- Cons: Heavier. The added rotational mass at the rear wheel can slightly dampen throttle response compared to aluminum.
- Verdict: Our overwhelming recommendation for 80% of riders. The longevity, cost-effectiveness, and “set-it-and-forget-it” reliability make steel the smart choice for most trail riders and daily users.
-
Aluminum Sprockets: The Featherweight.
- Pros: Dramatic weight reduction. Reducing rotational unsprung mass makes the suspension work more effectively and gives the bike a noticeably snappier, more lively feel on throttle inputs. The aesthetic anodized colors are a bonus.
- Cons: Significantly shorter lifespan. Aluminum wears much faster than steel, especially if not kept meticulously clean. They can be prone to tooth deformation under extreme stress.
- Verdict: Ideal for weight-conscious racers competing in motocross or enduro events where every millisecond of acceleration counts, and where parts are inspected and replaced frequently. For the average rider, the trade-off in longevity is rarely worth it.
Step-by-Step: How to Change Your Surron Sprocket
Disclaimer: Always consult your official Surron service manual. This guide is for informational purposes. Use proper tools and safety equipment. If you are not confident, seek a professional mechanic.
Tools & Parts You’ll Need
- New rear sprocket (correct tooth count & 420 pitch)
- Highly Recommended: A new 420 chain of appropriate length (often 120 links, but check)
- Chain breaker & rivet tool (or master link clip pliers)
- Socket set (for axle nut, sprocket bolts—typically 10mm or 12mm)
- Torque wrench
- Rear stand or lift
- Thread locker (blue Loctite 242)
- Wire brush & degreaser
Installation Walkthrough
-
Safety First: DISCONNECT THE MAIN BATTERY. This is non-negotiable. An accidental throttle blip with a loose chain can cause serious injury.
-
Rear Wheel & Chain Removal:
- Place the bike on a rear stand.
- Loosen the rear axle nut.
- Use your chain tool to remove the master link and separate the chain.
- Fully remove the rear axle and carefully pull the wheel assembly backward and out of the swingarm.
-
The Sprocket Swap:
- Secure the wheel. You may need to hold the brake disc or use an impact to break the sprocket nuts loose (they are often tight from the factory).
- Remove all sprocket nuts and washers. The old sprocket will come free from the carrier.
- Clean the sprocket carrier mating surface with a degreaser.
- Place the new sprocket on the carrier. Apply a drop of blue Loctite to each bolt thread.
- Hand-tighten all nuts in a criss-cross pattern, then torque them to the manufacturer’s specification (typically 44-48 ft-lbs / 60-65 Nm—always verify with your manual).
-
Reassembly & Critical Chain Adjustment:
- Reinstall the wheel into the swingarm. This is easier with the chain already draped over the new rear sprocket.
- Insert the axle and tighten the nut just enough to allow wheel movement.
- Thread the new chain (or cleaned old chain) through the front sprocket and connect it using a new master link. Never reuse an old master link clip.
- Chain Alignment & Tension: This is the most important step. The front and rear sprockets must be perfectly aligned. Adjust the chain tensioners evenly on both sides. Proper tension is about 20-30mm (0.8-1.2 inches) of up-and-down play at the midpoint between the sprockets. Too tight destroys bearings; too loose can derail.
- Once aligned and tensioned, torque the rear axle nut to spec (typically 65-72 ft-lbs / 88-98 Nm).
Post-Installation Checklist & Test Ride
- Reconnect the battery.
- Spin the wheel freely by hand to check for binding or odd noises.
- Perform a low-speed test in a safe area. Listen for chain slap or rubbing.
- After your first 15-20 minute ride, stop and re-torque the rear sprocket nuts and axle nut. Things can settle.
- Re-check chain tension after the first few rides as it will “break in.”
Performance Expectations & Trade-Offs
Let’s manage expectations. A sprocket change is a tuning tool, not a magic power adder.
Real-World Impact on Speed, Torque, and Range
- Torque & Acceleration: The change is immediate and tangible. Going +2 teeth on the rear makes the bike feel noticeably more urgent off the line. The wheel comes up easier. Hill climbs require less throttle.
- Top Speed: On a GPS, a +4 tooth change might reduce your top speed by 4-6 mph, depending on rider weight and conditions. Conversely, going -1 tooth on the rear might add 2-4 mph, if the motor has enough power to overcome aerodynamic drag.
- Battery Range: This is complex. While a lower (taller) gear can be more efficient at a steady cruise, a lower (shorter) gear that keeps the motor in its peak efficiency band during aggressive riding might not hurt range as much as you think. The biggest drain remains your right wrist.
The Chain & Wear Considerations
This cannot be overstated: The drive system is a set.
* A worn chain is stretched to fit the profile of your old, worn sprockets. Putting it on a new sprocket will cause the new teeth to wear prematurely to match the old chain’s uneven pitch.
* For optimal life and performance, replace the chain and both sprockets as a set. If your chain is relatively new, you might get away with just a sprocket, but inspect it closely.
* Extreme gearing changes (like a 50T+ rear) may require a longer chain. Always check fitment before final installation.
Frequently Asked Questions (FAQ) About Surron Sprockets
Q: Will changing my sprocket void my Surron’s warranty?
A: Modifications can affect warranty coverage on related components (drive system, motor, possibly controller if failure is linked). It is always best to consult your dealer or review Surron’s official warranty policy. Professional, damage-free installation is your best defense.
Q: How many teeth should I add for more wheelie power?
A: For a dramatic increase in low-end pop, adding 2-4 teeth to the rear sprocket (e.g., moving from 46T to 48T or 50T) is the most popular and effective mod. The bike will wheelie in multiple gears with far less effort.
Q: Can I just change the front (countershaft) sprocket instead?
A: Yes. Changing the front sprocket is cheaper, easier, and has a more pronounced effect per tooth. Going down 1 tooth in the front is similar to adding ~3.3 teeth in the rear. However, a front sprocket that is too small (e.g., 12T) increases chain bend and wear dramatically. A 13T or 14T front is common for lower gearing.
Q: How often should I replace my sprockets?
A: Inspect them every time you clean your chain. Look for teeth that are no longer symmetrical—they become hooked, pointed, or concave. If you see visible wear, replace the set. A well-maintained steel sprocket can last 2-3 chains.
Q: Do I need a new chain when I change my sprocket?
A: It is highly recommended, almost mandatory for a long-lasting result. Installing new sprockets with an old chain is the single biggest mistake you can make. It will accelerate wear on your expensive new parts. Consider it an investment in the entire system’s longevity.
Conclusion
Choosing the right Surron sprocket is one of the most satisfying and impactful modifications you can make. It’s a direct dialogue with your bike’s personality, allowing you to tune its character for your specific terrain and goals. There is no universal “best” sprocket—only the best choice for your riding.
By understanding the fundamental trade-off between acceleration and top speed, and making an informed choice between durable steel and lightweight aluminum, you’re equipped to make a confident upgrade. Remember, the quality of the installation—proper torque, alignment, and chain maintenance—is just as critical as the part you select.
Your Surron is a platform for experimentation. Start with a modest change, see how it feels, and adjust from there. The community is rich with knowledge, so engage with reputable forums and mechanics. Now, bolt on that new sprocket, reconnect the battery, and go experience your Surron in a whole new way.
METADATA_START—
DISPLAY_TITLE: The Ultimate Guide to Surron Sprockets: Gearing for Performance
SEO_TITLE: Surron Sprocket Guide: Choose, Install & Optimize for Speed or Torque
META_DESC: Master your Surron’s performance. Our definitive guide explains sprocket gearing, steel vs. aluminum, and provides a step-by-step installation to optimize torque, speed, and range.
IMG_PROMPT: A detailed, close-up photograph of a new, anodized red aluminum sprocket next to a durable steel sprocket for a Surron electric dirt bike, with a 420 chain draped across them, sitting on a workbench with tools in the background. Professional lighting, sharp focus.
—METADATA_END—